
Welcome to the wonderful world of canning! Whether you’re looking to preserve your bountiful garden harvest, enjoy seasonal produce year-round, or simply embrace the joy of homemade food, canning is a fantastic skill to master. In this guide, we’ll walk you through the basics of canning, including the different methods, essential equipment, and some handy tips to get you started.
What is Canning?
Canning is a method of preserving food by sealing it in airtight containers. This process prevents the growth of bacteria, yeasts, and molds, keeping your food safe and delicious for months or even years.
A Brief History of Canning
The story of canning dates back to the late 18th century when French confectioner Nicolas Appert discovered that food could be preserved by cooking it, placing it in sealed glass jars, and heating them to a specific temperature. Appert’s method was a response to a challenge posed by Napoleon Bonaparte, who needed a reliable way to supply his troops with safe, long-lasting food.
In the early 19th century, Appert’s discovery caught the attention of the British, and Peter Durand patented the use of tin cans for food preservation in 1810. This innovation made canning more practical and efficient, eventually leading to the widespread adoption of the technique.
Today, canning remains a popular method for preserving food at home, allowing us to enjoy the taste of summer all year long.
Types of Canning Methods
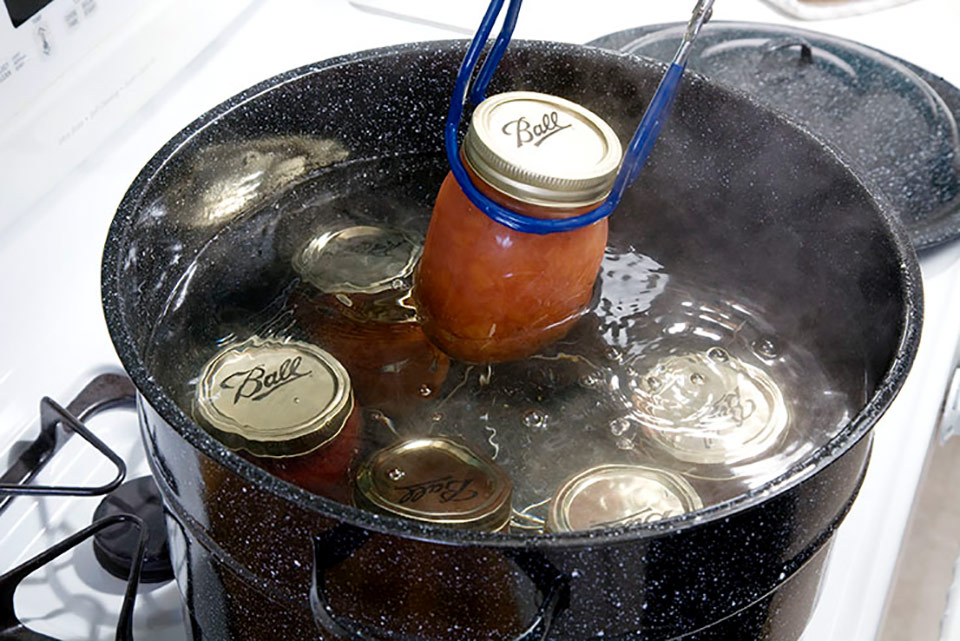
Water Bath Canning
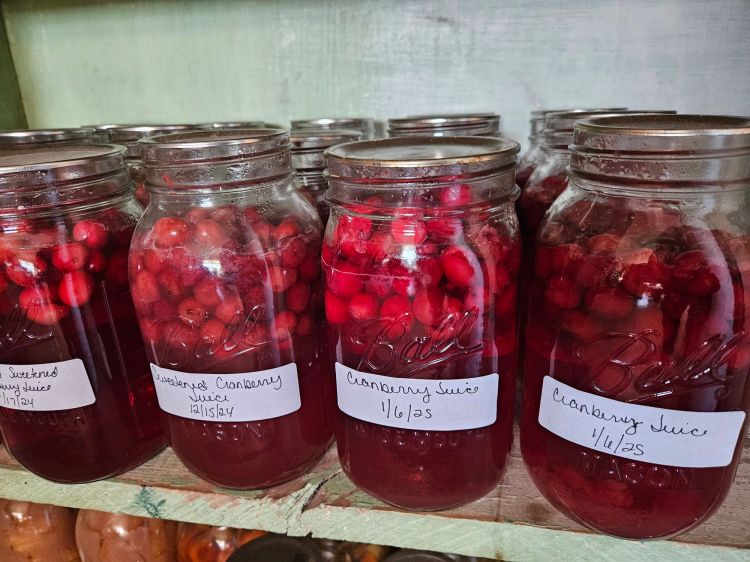
Water bath canning is ideal for preserving high-acid foods, including fruits, jams, jellies, pickles, and tomatoes. The high acid content in these foods inhibits the growth of harmful bacteria, making them safe for this relatively simple method.
Why Use Water Bath Canning?
- Best for High-Acid Foods: Fruits (like peaches, berries, and apples), pickles, salsas, and acidified tomatoes.
- Easy to Learn: Requires minimal equipment and is a great starting point for beginners.
Equipment Needed
- Large Pot: A deep pot with a lid, large enough to fully submerge jars.
- Canning Rack: Keeps jars off the bottom of the pot, ensuring even heating.
- Canning Jars: Glass jars designed for canning, available in various sizes.
- Lids and Bands: Metal lids that create an airtight seal and bands to secure the lids during processing.
- Jar Lifter: Essential for safely handling hot jars.
- Canning Funnel: Helps fill jars without spills.
- Bubble Remover: Helps to eliminate air bubbles from the filled jars.
Steps for Water Bath Canning
- Prepare Your Equipment: Sterilize your jars, lids, and bands by boiling them for 10 minutes. Keep jars warm to prevent cracking when filling with hot food.
- Prepare Your Food: Follow your recipe to prepare the food you’ll be canning.
- Fill the Jars: Use a funnel to fill jars with hot food, leaving the recommended headspace (usually 1/4 to 1/2 inch). Remove air bubbles and wipe jar rims clean.
- Seal the Jars: Place lids on jars and screw bands fingertip-tight.
- Process the Jars: Place jars in the canner on the rack. Ensure they are covered with at least 1 inch of water. Bring to a boil and process for the time specified in your recipe.
- Cool and Store: Remove jars and let them cool undisturbed for 12-24 hours. Check seals, label jars, and store in a cool, dark place.
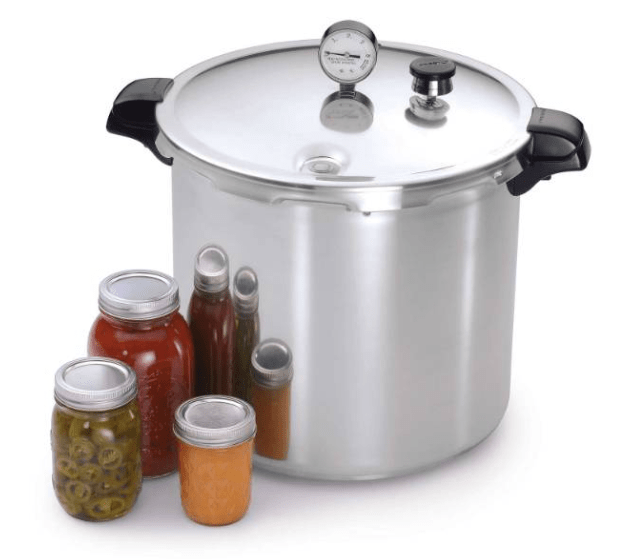
Pressure Canning
Pressure canning is essential for preserving low-acid foods, such as vegetables, meats, and poultry. These foods require the higher temperatures achieved by pressure canning to eliminate the risk of botulism, a potentially deadly foodborne illness.
Why Use Pressure Canning?
- Best for Low-Acid Foods: Vegetables (like green beans, carrots, and potatoes), meats, seafood, and soups.
- Ensures Food Safety: Reaches higher temperatures than boiling water, killing harmful bacteria and spores.
Equipment Needed
- Pressure Canner: A specialized pot with a locking lid and pressure gauge or weight.
- Canning Jars: Sturdy glass jars designed for pressure canning.
- Lids and Bands: Metal lids that create an airtight seal and bands to secure the lids during processing.
- Jar Lifter: For safely handling hot jars.
- Canning Funnel: Helps fill jars without spills.
- Bubble Remover: Helps to eliminate air bubbles from the filled jars.
Steps for Pressure Canning
- Prepare Your Equipment: Sterilize jars, lids, and bands by boiling them for 10 minutes. Keep jars warm to prevent cracking when filling with hot food.
- Prepare Your Food: Follow your recipe to prepare the food you’ll be canning.
- Fill the Jars: Use a funnel to fill jars with hot food, leaving the recommended headspace (usually 1 to 1 1/2 inches). Remove air bubbles and wipe jar rims clean.
- Seal the Jars: Place lids on jars and screw bands fingertip-tight.
- Process the Jars: Place jars in the pressure canner on the rack. Add water according to your canner’s instructions. Secure the lid and bring the canner to the recommended pressure. Process for the time specified in your recipe, adjusting for altitude if necessary.
- Cool and Store: Allow the canner to cool and release pressure naturally. Remove jars and let them cool undisturbed for 12-24 hours. Check seals, label jars, and store in a cool, dark place.
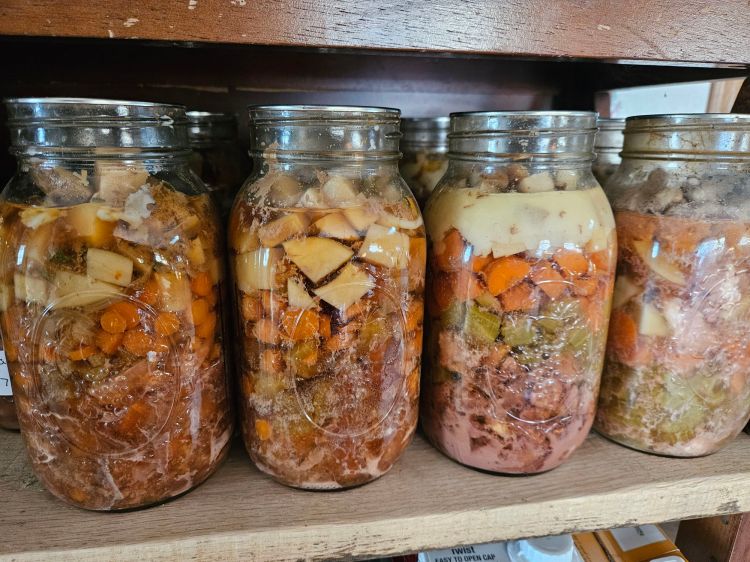
Rebel Canning: The Risks and Rewards
Rebel canning is a term used by some home canners who prefer to diverge from conventional recipes and guidelines, experimenting with their own methods and ingredients. This DIY spirit resonates with many folks who relish the freedom and creativity in their kitchen.
Why Some People Choose Rebel Canning
- Creativity in the Kitchen: Creating unique recipes and experimenting with flavors.
- Personal Preference: Tailoring recipes to suit individual tastes and dietary needs.
- Traditional Methods: Some families have their own trusted canning methods passed down through generations.
Potential Risks of Rebel Canning
- Food Safety: Without following tested recipes, there’s a risk of improper processing, leading to foodborne illnesses such as botulism.
- Inconsistent Results: Deviating from recommended procedures can result in spoiled food or jars that don’t seal properly.
A Balanced Approach
While the rebel canning spirit is admirable, it’s essential to balance creativity with safety. Here are some tips for safer experimentation:
- Understand the Basics: Familiarize yourself with the principles of safe canning. Knowing the science behind it will help you make informed decisions.
- Use Tested Recipes as a Base: Start with a trusted recipe and make small adjustments, keeping the core safety guidelines intact.
- Stay Informed: Keep up with the latest canning safety recommendations from reliable sources like the USDA or your local extension office.
Remembering Our Roots
Indeed, long before the Ball recipe books, people were preserving food using methods that worked for them. While modern guidelines provide a safety net, it’s fascinating to acknowledge the rich history of canning and the ingenuity of those who paved the way.
Canning is a rewarding and practical way to preserve your favorite foods. With a little practice and the right techniques, you’ll be able to enjoy the taste of summer all year long. Happy canning!
Ready to Master the Art of Canning?
Join our expert-led canning classes and unlock the secrets to preserving your favorite foods with confidence and creativity. Whether you’re a beginner or looking to refine your skills, our hands-on workshops will guide you through every step of the canning process. Learn tried-and-true techniques, discover new recipes, and become part of a passionate community of home canners.
Sign up today and take your canning skills to the next level!
