I don’t know about you, but for me, the fewer chores I have to do, the better. Especially in the winter months. This is why I chose to use the deep litter method for our coops here on the farm. Only have to clean the coops out completely once or twice a year? Yes, please, sign me up!
I often get asked how and why we use this method. Most people think that it makes for a very unsanitary place for the birds to be and that it leads to dirty birds, dirty eggs, and a horrible smell. But when done correctly, none of those things happen. So let’s look at the how and the why.
How to use Deep Litter
So the basis of the deep litter method is to start with about 6 inches of good, dry litter then allow the birds to do what they normally do. As needed, add a light dusting of new litter on top. You can sprinkle scratch grains around as well to encourage the birds to scratch and peck through the litter when they are inside to help with aeration and mixing.
IIf you have an outside compost pile, you are the one required to do all the aerating and mixing, but inside the coop, the birds do the work for you! Rarely do they dig all the way to the ground, but if they do, you can rest assured that they are finding many tasty bugs and things on the way down as the deep litter method encourages various beneficial microorganisms, including bacteria and fungi, along with macroorganisms like beetles, worms, and flies.1
The best bedding that I have found for doing the deep litter method is fine pine shavings. However, I have known others who use things such as shredded paper, straw, leaves in the fall, thoroughly dried grass clippings, or hay (which is what we are currently using and I don’t personally recommend). Each has its own benefits and drawbacks, as you can see from this infographic from Mile Four.

Choosing the Right Litter Materials
As mentioned, there are various different materials that you can use when doing the deep litter method, some better than others, So let’s take a look at each one a little deeper.

Pine Shavings
Using pine shavings is my number one choice because of how long it lasts, ease of cleaning (if needed), and because locally, I can pick up enough to do all 3 of my coops for around $20 to $25. Since I only need to add a light layer on top as needed, this amount of shavings will actually last me a month or so before I have to add more and once the initial layer has been put down, each subsequent purchase will last me about 2+ months before buying more. Pine shavings also have a fainter smell to them than cedar shavings.
DO NOT USE CEDAR SHAVINGS. The chemicals released by the wood that cause the smell in both pine and cedar are very toxic to chickens. However, there are fewer risks with those chemicals in pine than there are in cedar. Cedar can cause respiratory infections in chickens very quickly with a small amount of shavings, whereas, with pine, they would need to be trapped in an unventilated area with a large quantity of pine shavings for an extended period. If this risk is too much, you can also look for other types of wood shavings.
Side note: Be sure to get shavings and not wood chips. They are much harder and come in larger pieces, which will not absorb moisture or break down easily.

Straw
Straw is one that can be used alone or you could add chopped straw to the pine shavings. I shy away from it for 2 reasons, however. One is that when we would use it with the horses, we found out that mites like to live inside the straw shafts. I don’t know about anyone else, but I don’t particularly care to treat 20+ birds for any mites that may make a home in the straw before or after I purchase it.
The second reason is the way that straw is made, combing the dry stocks of grain left over after a harvest of wheat, oats, barley, or rye. Oftentimes, farmers will use herbicides and pesticides on the crops prior to harvest, and sometimes there is no way to know if you are receiving treated materials or not. While I have not seen birds harmed by the residues, if you are adding the bedding to your garden or compost once you clean out the coop, it can do some significant damage!
When we have used straw, I have also noticed that the hollow stems do tend to hold in moisture and it becomes a very muddy mess in the wet months. Add to that the smell from the constantly wet bedding… yuck!
But if you have better cleanliness practices than we do, or a dryer climate, straw is a great bedding choice as it does not break down super quick making it a longer-lasting bedding, the hens love making their own nests in it, it’s super soft and does do a really good job of insulating the coop to make it warmer.

Sand
Sand is not one that I recommend for a deep litter method. The purpose of deep litter is for the components to begin breaking down before you remove them from the coop and add them to wherever you need compost. Sand, to my knowledge, does not break down any further but it will add trace minerals to the compost in small amounts. It is fantastic for drainage, but if you get too much, then your compost or litter will not have enough moisture to properly break down the other ingredients.
Adding it in as one of the fine layers on top of an established deep litter method could provide to be beneficial, however, if you have the right amount of other materials. It will not only add those trace minerals, but it will also help keep the moisture content down inside the coop and the chickens can also use it for grit if they need to as they are scratching and pecking through the bedding. Sand does not generally encourage the breaking down of the other litter components, nor does it attract those wanted micro- and macro-organisms. “Some sands have a large lime or sodium content that will adversely affect your soil quality and can harm your plants’ ability to grow. Choose a horticultural quality sand from a gardening center or nursery only. Never mine your sand from a natural setting unless you are well aware of its mineral content, sodium levels, and pH balance.”2
It does make a really nice bedding for the run, however, and the girls love to dust bathe in it!

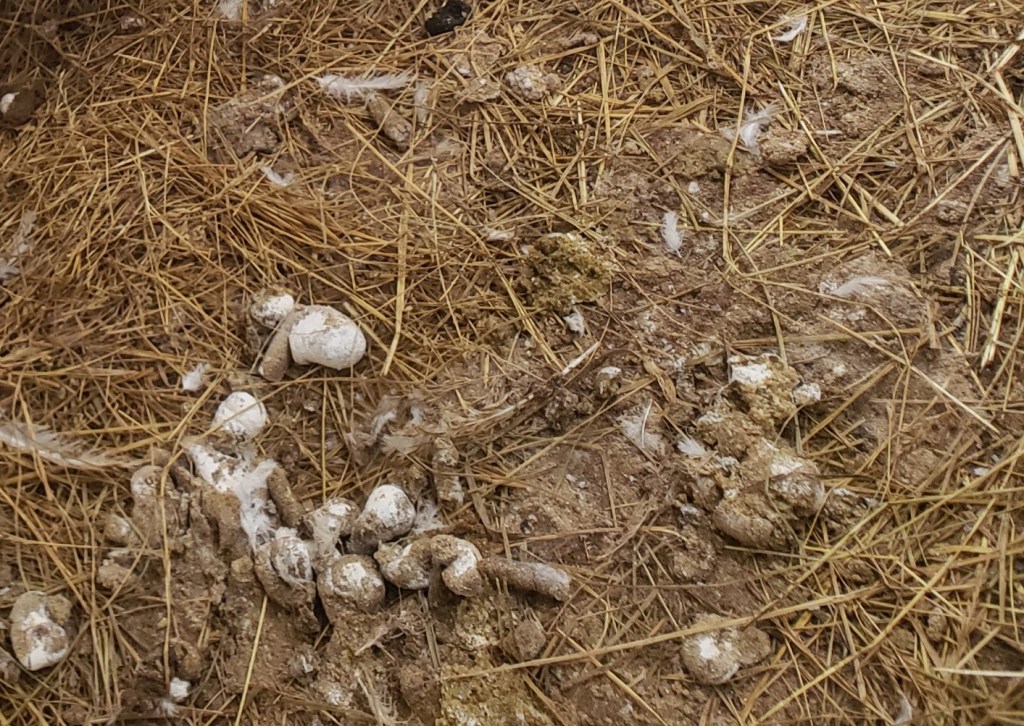
Hay
Hay is what we are currently using for our coops because it was free and there were about 75 bales readily available. Many of the same issues arise with hay as they do with straw, namely that the bedding stays wet, it takes a ridiculously long time to break down, is quick to mold in unhealthy amounts, and would, in my opinion, make a better mulch than bedding. Using it in the nest boxes also leads to dirty eggs as it tends to stick to them and whatever other nasty mess the hens bring in, be it mud or manure.
The other problem you could run into with hay as composting bedding is actually a benefit for the birds, assuming they could access it. Hay has quite a bit of a seed load in general. While this would be bad in a compost pile, as you don’t want to introduce weed seeds to your garden, the chickens will love hunting the seeds and it will give them a bit of a treat. But with the pieces of hay being bound together the way they are in baler, it makes it hard for the birds to scratch through them. That makes hay a very undesirable material for deep bedding as it has to manually be turned and mixed a few times a week. The purpose of this method is less work, not more.
You also have to watch for treated hay just as you would with treated straw. You don’t want to introduce herbicides and pesticides into the coop if you are trying to build a thriving ecosystem in which the materials will be broken down efficiently, nor do you want to introduce them into the compost that you use in your garden. You can lose your entire garden from treated hay or straw.

Grass Clippings
Grass clippings are not a very common bedding material around here. You don’t want to use them fresh from cutting, because there is still a huge moisture content in them, leading to mold and a host of other issues. And most people don’t want to take the time to windrow them and dry them out thoroughly into a basic kind of hay bedding. There can also be large amounts of seeds, fertilizer, herbicides, and pesticides that have been sprayed on the law from which they come as well.
Fresh grass clippings are very high in nitrogen and will only slow down composition further by adding chicken manure, which also has a high nitrogen content. In order to compost efficiently, you have to have the correct ratio of carbon to nitrogen. Otherwise, you are in for a moldy, nasty, slimy mess that won’t be a benefit to anyone.
Dried grass clippings are higher on the carbon scale and will break down quicker, however, they will also retain moisture. Another good additive as one of the layers of your deep litter, but I would not suggest using them solely as your bedding.

Dried Leaves
Dried leaves in the fall are great coop bedding as long as they come from untreated trees. Again, you don’t want to introduce any chemicals that could be hazardous to your chickens or the garden. They are a high carbon content that the chickens can easily scratch and peck through. They provide entertainment for the chickens as well as bedding and warmth. And they’re free! The downside is that they do break down very quickly and they do have the capacity to have a high moisture content, Another additive that I highly recommend is not to be your only bedding source.

Shredded Paper
Now the shredded paper is the one material that I have not personally tried in the coop. I have used newspapers in the brooder and that turns into a wet, slick, stinky mess, so logically, I can only assume that this would as well. I do know that newspaper and other papers without a laminate covering are a favorite of the vermicomposting bins and I have seen for myself how newspaper seems to magically draw worms from the ground.
It is, however, very absorbent (until it reaches its saturation point, which seems to be very quickly) and soft, so would make a great additive or base layer. The downside is that if you were to use this as your sole material, it can not be cleaned and would need to be completely removed and replaced or another material added on top of it as another layer of paper would simply pull the moisture from the first layer.
Conclusion
When it comes to deep litter in your chicken coop, you want to choose a material that is right for your flock and your budget. Even if a material isn’t ideal, if that’s what you have, start with that! You can always mix and match with materials to see what works best for your flock and for what you want your finished product to look like. Do you need something to go on the garden right when you clean the henhouse out? Then find something that composts quickly. Needing mulch or something to add to your compost pile that doesn’t need to be the finished product, then find something that breaks down slower.
Keep in mind that you don’t want to start this process in the middle of winter when the beneficial organisms have dove deep for the year looking for warmer soil. You want to have this well on its way and cooking before it gets cold out in order to add heat to the flock. Otherwise, you’re just going to have a lot of frozen, dirty bedding that will likely do more harm than good.
Did I miss anything? Have you done the deep litter method?
Tell us about it in the comments!
Resources
- Know Your Chickens – Deep Litter Method For Chicken Coops: The Complete Guide
- Mile Four – Chicken Bedding Guide
- Compost Guide – Can You Mix Sand With Compost?
If you haven’t already, be sure to check out our NEW Facebook Page Huckleberry Farms! Get daily posts about the goings on at the farm, funny memes, and information bites that can help you with your homestead journey!
